How to set up your email client with IMAP, POP3, and SMTP
Set up your email client the right way. Learn IMAP vs POP3, SMTP settings, and how to keep business email synced across devices.

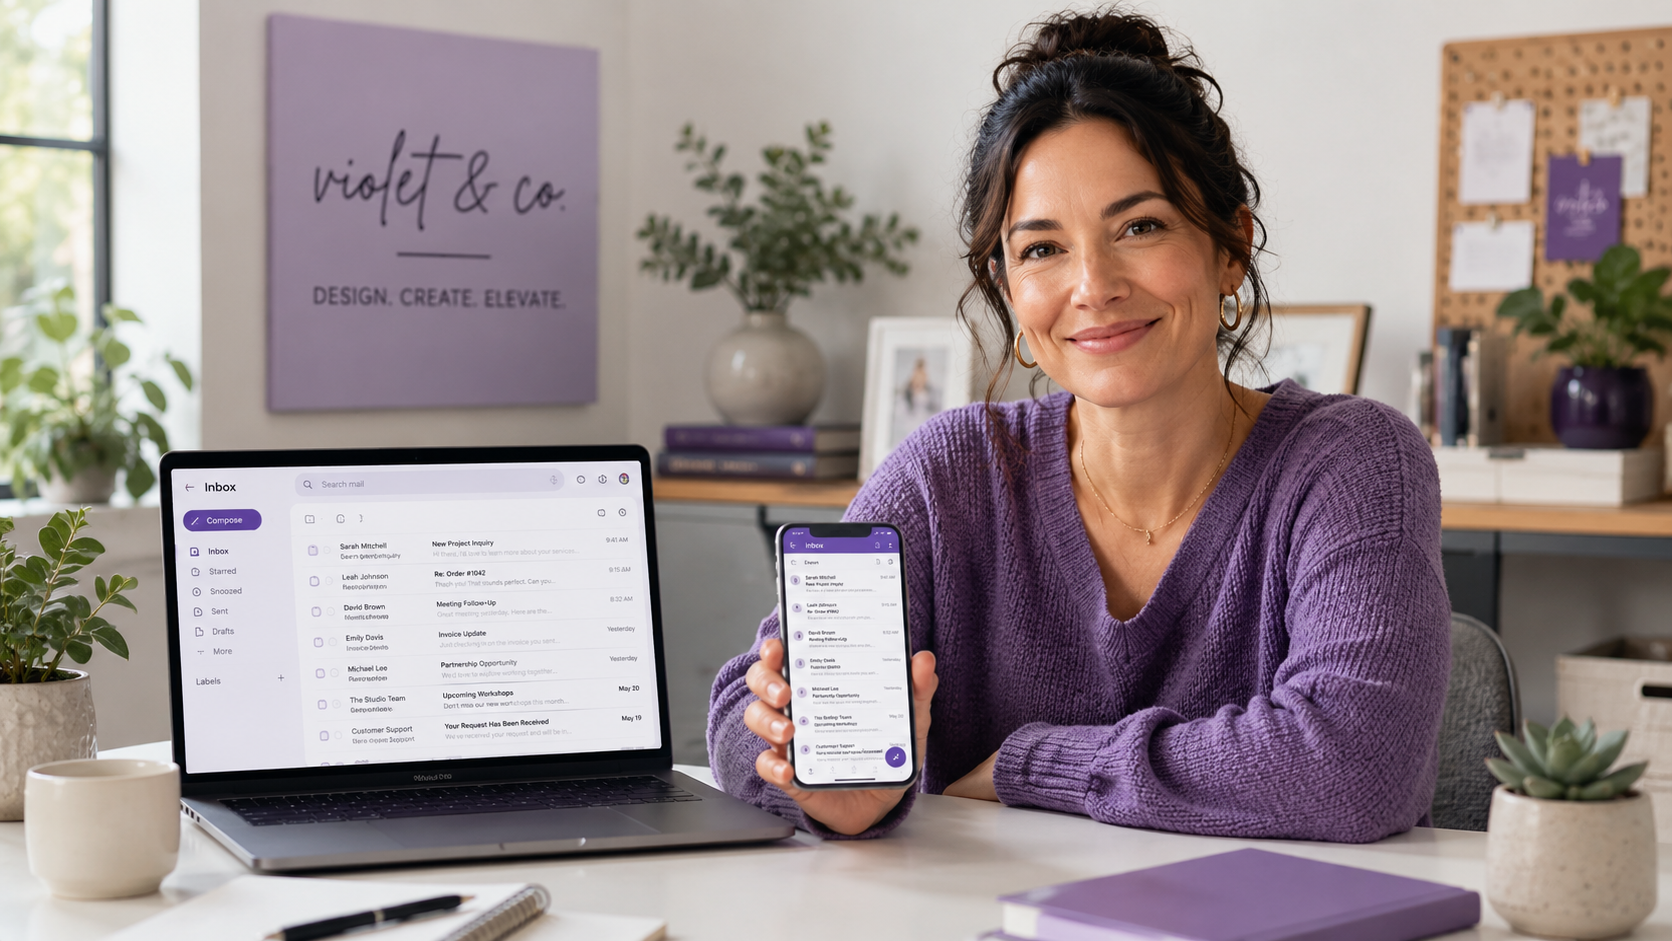
Setting up email should not feel like decoding a secret message from a very boring spy agency. Yet the moment your email app asks you to choose between IMAP and POP3, things can get weirdly technical, weirdly fast. If you run a small business, manage client messages, or just want your inbox to behave properly across your phone and laptop, this choice matters. The good news is that once you understand the difference, email setup becomes much less mysterious and a lot more manageable.
Table of contents
- What is an email client?
- What are IMAP, POP3, and SMTP?
- IMAP vs POP3: the simple difference
- Why IMAP is usually the right choice
- When POP3 still makes sense
- What SMTP does and why you need it
- Common email client settings
- How to set up IMAP step by step
- Common mistakes to avoid
- Why professional email matters
- Final thoughts
What is an email client?
An email client is the app or program you use to send, receive, read, organize, and search your email. That could be Apple Mail, Microsoft Outlook, Thunderbird, the Gmail app, your phone’s built-in Mail app, or another email program you prefer. When you add your email address to one of these apps, the app needs a way to talk to your email provider’s mail server. That conversation happens through email protocols, which are simply rules that tell your app how to receive and send messages.
For most small business owners, the email client is not the exciting part of the business. You are probably more focused on customers, invoices, meetings, orders, bookings, or finally replying to that one message you mentally answered three days ago. Still, your email setup is part of your business foundation. When it works properly, you barely notice it, and that is exactly the point.
Your email client connects to your email account using incoming and outgoing mail settings. The incoming settings control how messages arrive in your inbox. The outgoing settings control how messages are sent from your address. That is where IMAP, POP3, and SMTP come in.

What are IMAP, POP3, and SMTP?
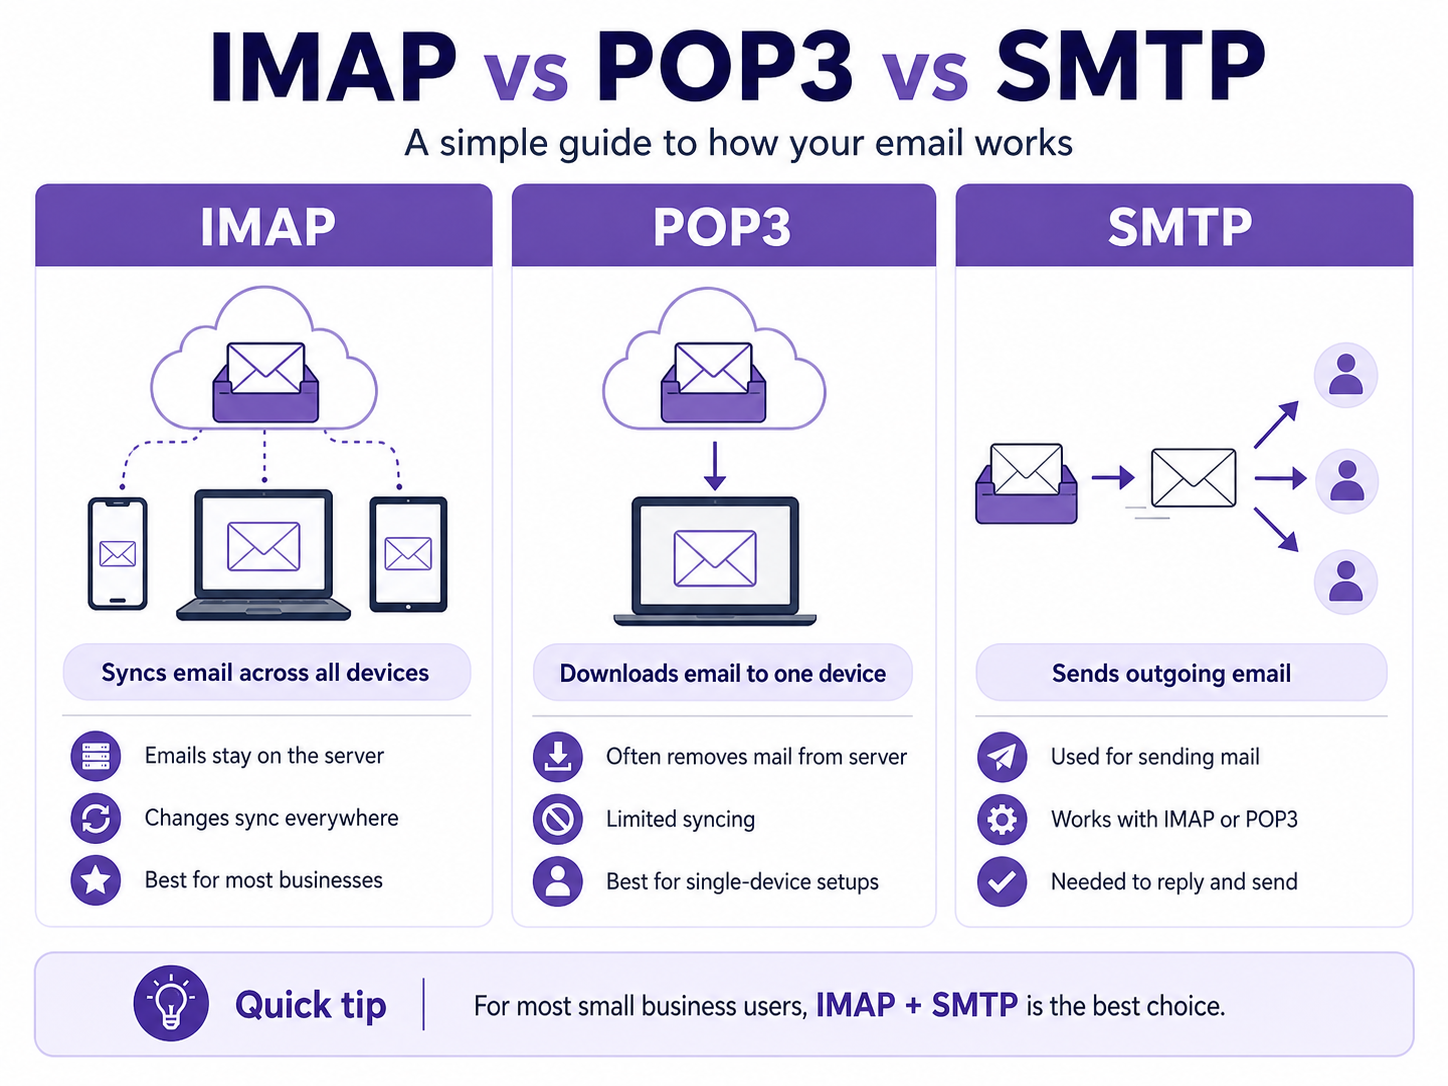
IMAP, POP3, and SMTP are email protocols, which is a fancy way of saying they are the systems your email app uses to communicate with your email server. They sound more intimidating than they are. You do not need to become an email engineer to set up your inbox properly. You just need to know which one does what.
IMAP stands for Internet Message Access Protocol. It keeps your email on the server and syncs it across your devices. That means when you read, delete, move, or reply to a message on your phone, the same change appears on your laptop, tablet, and webmail account. For most modern email users, especially business users, IMAP is the smoothest and most practical choice.
POP3 stands for Post Office Protocol version 3. It downloads messages from the server to one device, often your computer. Depending on the settings, it may remove the original copy from the server after downloading it. That can be useful in very specific situations, but it can also create confusion when you use more than one device.
SMTP stands for Simple Mail Transfer Protocol. It handles outgoing mail. IMAP and POP3 help you receive email, but SMTP is what lets you send it. If your incoming settings are correct but your SMTP settings are missing or wrong, you may be able to receive messages without being able to reply to anyone, which is not ideal for a thriving business or your blood pressure.
IMAP vs POP3: the simple difference
The easiest way to understand the difference is to think about where your emails live. With IMAP, your emails live on the mail server, and your devices show you a synced view of that mailbox. With POP3, your emails are downloaded to a device, and depending on the settings, that device may become the main place where those messages live. That single difference affects almost everything about your email experience.
If you use IMAP, your phone, laptop, desktop, tablet, and webmail all stay in step with each other. When you archive a message on your laptop, it is archived on your phone too. When you send a quote from your tablet, it can appear in the sent folder on your desktop. Your inbox behaves like one shared mailbox, no matter which device you are using.
If you use POP3, things can feel less connected. Your laptop might download a customer inquiry before your phone sees it. Your phone might not show older emails because they were already pulled down somewhere else. Your sent folder may not match across devices. This is the kind of tiny daily friction that makes email feel messier than it needs to be.
For Rebel users, IMAP is usually the clearer recommendation because most small business owners do not work from one device anymore. You might answer a customer from your phone, follow up from your laptop, and check a tracking number from your tablet. Your email setup should support that reality. IMAP does exactly that.
Why IMAP is usually the right choice
For growth-focused small businesses and solopreneurs, IMAP is usually the best email client setup. It gives you flexibility, keeps your messages synced, and reduces the risk of email surprises. It also matches the way most people work today, where one inbox needs to be available from several places. That matters when your email is tied to sales, support, bookings, partnerships, invoices, or client trust.
Here is why IMAP tends to be the friendlier option for everyday business use:
- Your inbox syncs across devices. With IMAP, your phone, laptop, desktop, and tablet all show the same mailbox. If you read an email on one device, it shows as read everywhere else. If you move a message into a client folder, that folder update follows you. This is especially helpful when your workday moves between your desk, a coffee shop, your couch, and the grocery store parking lot.
- Your email stays on the server. Because IMAP stores messages on the server, your email is not tied to one physical device. If your laptop breaks, gets replaced, or decides to retire dramatically without notice, your inbox is still available when you sign in from another device. This gives small business owners a little more peace of mind. It also makes switching devices much easier.
- Folders, sent mail, and drafts stay consistent. IMAP syncs more than just your inbox. It can also keep folders, sent items, drafts, and deleted messages aligned across your devices. That makes it easier to find what you need later. When you are dealing with client conversations or order details, that consistency is a small but mighty gift.
- It works better for shared access. If a team member, assistant, or trusted collaborator ever needs to help manage an inbox, IMAP is much easier to work with. Everyone can access the same mailbox structure and see updated message status. That helps prevent duplicate replies or missed customer messages. It also keeps your workflow cleaner as your business grows.
- It supports a more mobile way of working. Many small business owners answer email between tasks, meetings, errands, and customer calls. IMAP makes that easier because your inbox is not locked to one machine. You can start something on your phone and finish it on your computer. That flexibility is useful, even if your business is still a team of one.
When POP3 still makes sense
POP3 is older, but that does not mean it is useless. It can still make sense in a few specific situations. The key is knowing whether those situations apply to you before choosing it. For most Rebel users, they probably will not.
POP3 may be a fit when you truly only use one device for email and have no plans to change that. It may also be useful if your email server has very limited storage and you intentionally want to download messages locally instead of keeping them online. Some people also use POP3 for archiving old mail to a single computer. These cases are valid, but they require a more deliberate setup.
The risk is that POP3 can create confusion when it is selected by accident. If your email disappears from webmail after being downloaded, or if your phone and laptop show different inboxes, POP3 may be the reason. Some email apps include a setting to leave copies of messages on the server, which can soften the problem. Even then, POP3 usually does not offer the same clean syncing experience that IMAP provides.
For a small business, email should feel reliable and predictable. If you are not intentionally building a single-device workflow, POP3 is probably not the path you want. IMAP is more forgiving, more flexible, and better suited to the way most people manage business communication now. POP3 has its place, but that place is usually not the default setup screen.
IMAP vs POP3 comparison
Before you choose your setup, it helps to see the differences side by side. A comparison makes the decision easier because the right choice depends on how you actually use email. If your inbox needs to follow you across devices, IMAP is the stronger fit. If you are creating a local archive on one computer, POP3 may still have a role.
| Feature | IMAP | POP3 |
|---|---|---|
| Works across multiple devices | Yes | Limited |
| Keeps email on the server | Yes | Often no, depending on settings |
| Syncs read/unread status | Yes | Usually no |
| Syncs folders and sent mail | Yes | Usually no |
| Good for teams or assistants | Yes | Not ideal |
| Good for single-device local storage | Less ideal | Yes |
| Best fit | Most small business users | Specific archive or one-device setups |
For most Rebel users, the practical takeaway is simple: choose IMAP unless you have a specific reason not to. It gives you the least friction and the most flexibility. It is also easier to support when you add new devices later. Future-you will appreciate not having to untangle a mystery inbox situation before coffee.
What SMTP does and why you need it
SMTP is easy to overlook because people usually focus on receiving email first. But SMTP is just as important because it controls outgoing mail. Without properly configured SMTP settings, your email client may connect to your inbox but fail when you try to send a message. That can be frustrating, especially when the message is a proposal, a customer reply, or a password reset you actually need.
Most email clients ask for outgoing mail settings during setup. These settings usually include an SMTP server name, a port number, an encryption type, and authentication details. In plain language, your email app needs to know where to send outgoing messages and how to prove that you are allowed to send from that account. This helps protect your email address from unauthorized use.
A common mistake is assuming that if incoming mail works, outgoing mail will automatically work too. Sometimes it does, especially when your app auto-detects the settings. Other times, you need to enter SMTP details manually. If you can receive messages but not send them, your SMTP settings should be one of the first things you check.
For many providers, SMTP uses port 587 with STARTTLS or TLS encryption, while some providers also support port 465 with SSL/TLS. Microsoft lists SMTP settings for Outlook.com accounts in its support documentation, and Google documents Gmail’s IMAP, POP, and SMTP access for mail clients. Yahoo also provides official IMAP guidance for third-party apps.
Common email client settings
Email settings can vary by provider, so you should always check your own provider’s documentation before finalizing setup. Still, some common settings appear often enough that they are useful to know. These examples can help you understand what your email app is asking for. They also make troubleshooting less intimidating when something does not connect on the first try.
| Provider | Incoming IMAP server | IMAP port | Outgoing SMTP server | SMTP port |
|---|---|---|---|---|
| Gmail | imap.gmail.com | 993 | smtp.gmail.com | 587 |
| Outlook.com / Microsoft | outlook.office365.com | 993 | smtp-mail.outlook.com or provider-listed SMTP server | 587 |
| Yahoo Mail | imap.mail.yahoo.com | 993 | smtp.mail.yahoo.com | 465 or 587 |
| Custom domain email | Often mail.yourdomain.com | Often 993 | Often mail.yourdomain.com | Often 465 or 587 |
For custom domain email, your settings depend on your hosting provider or email provider. If your email is managed through cPanel, the email client setup area can show the correct manual settings for your account. cPanel’s documentation explains that its setup interface helps users configure mail clients and find the right details for their specific address.
If you host your domain or email with Rebel, the most important thing is to use the exact settings provided for your account. A single typo in the server name, username, or port number can stop the connection from working. Your full email address is often used as the username, not just the part before the @ symbol. That small detail catches a lot of people, so it is worth checking twice.
How to set up IMAP step by step
Once you have the right settings, email client setup is usually a straightforward process. The exact labels vary by app, but the flow is similar almost everywhere. You add a new account, choose manual setup if needed, select IMAP, enter incoming and outgoing server details, and test the account. It sounds like a lot, but it is mostly careful copying and pasting.
Before you start, gather these details from your provider:
- Your full email address. This is usually the username for both incoming and outgoing mail. For a business address, that might look like
hello@yourdomain.com. Make sure there are no extra spaces before or after it when you paste it into your app. Email setup forms can be surprisingly fussy about tiny formatting issues. - Your email password or app password. Some providers require an app-specific password when you use third-party mail apps. This is common when two-factor authentication is turned on. If your regular password does not work but you are sure it is correct, check whether your provider requires an app password. This is a security feature, not a personal attack from your inbox.
- Your incoming IMAP server. This tells your app where to retrieve and sync your incoming mail. For many custom domain accounts, it may look like
mail.yourdomain.com, but you should confirm the exact value. The IMAP port is usually 993 when SSL/TLS encryption is used. Secure settings are strongly recommended for business email. - Your outgoing SMTP server. This tells your app where to send outgoing messages. It may be the same as your incoming server for custom domain email. The SMTP port is often 587 with STARTTLS or 465 with SSL/TLS, depending on your provider. You should also make sure outgoing authentication is turned on.
Apple Mail on Mac
Open Apple Mail and go to Mail > Add Account. Choose Other Mail Account if your provider is not listed. Enter your name, full email address, and password. If Apple Mail cannot configure the account automatically, choose IMAP and enter your incoming and outgoing server settings manually.
After the account is added, send a test message to another email address you can access. Then reply to that message from the other account to confirm both sending and receiving work properly. Check that sent messages appear in the correct sent folder. If anything looks off, review your SMTP settings first.
Microsoft Outlook on Windows
Open Outlook and go to File > Add Account. Enter your email address and choose advanced or manual setup if Outlook does not automatically detect the settings. Select IMAP, then enter the incoming and outgoing server details from your provider. Use your full email address as the username unless your provider says otherwise.
Once the account connects, test both sending and receiving. Outlook may take a few minutes to sync folders, especially if your mailbox contains a lot of messages. If the inbox works but sending fails, the outgoing server settings likely need attention. Check the SMTP server, port, encryption method, and authentication settings.
iPhone or iPad
Open Settings > Mail > Accounts > Add Account. Choose your provider if listed, or select Other for custom domain email. Tap Add Mail Account, then enter your name, email address, password, and account description. Select IMAP and enter the incoming and outgoing mail server details.
After saving, open the Mail app and allow the account to sync. Send a test message and confirm that it arrives. Then check webmail or another device to make sure the message appears in the sent folder. If your phone keeps asking for a password, verify whether your provider needs an app password.
Android mail apps
Open your preferred mail app and choose Add account. Select Other, Personal (IMAP), or a similar option depending on the app. Enter your email address and password, then choose manual setup if the app does not detect the settings. Add the IMAP and SMTP details provided by your email host.
Once setup is complete, test both directions. Send a message, receive a reply, and check that folders are syncing. Android devices can vary by manufacturer and app, so the wording may not match every guide exactly. The important part is choosing IMAP and entering the correct server settings.
Common mistakes to avoid
Most email setup issues come from small details, not giant technical disasters. That is good news because small details can be fixed. If your email client will not connect, resist the urge to assume everything is broken. Start with the basics and work through them one at a time.
Here are the most common email client setup mistakes to check:
- Choosing POP3 by accident. IMAP and POP3 often appear beside each other in setup screens. It is easy to tap the wrong option when you are moving quickly. If your email is not syncing across devices, check the account type. Switching to IMAP usually creates a better experience for multi-device use.
- Using the wrong port number. Secure IMAP commonly uses port 993. SMTP often uses port 587 with STARTTLS or 465 with SSL/TLS, depending on the provider. If the server name is correct but the account still will not connect, the port number may be the culprit. Match the port to the encryption type your provider recommends.
- Forgetting outgoing SMTP authentication. Some apps have a separate setting for outgoing server authentication. If that setting is off, you may receive mail but fail to send it. Use the same username and password as your incoming mail unless your provider gives different instructions. This is one of the fastest fixes to try when sending fails.
- Entering only part of the username. Many providers require the full email address as the username. That means
you@yourdomain.com, not justyou. If your password keeps failing, check the username field before resetting anything. The password may be fine while the username is incomplete. - Skipping provider-specific security steps. Gmail, Yahoo, Microsoft, and other providers may require modern authentication, two-factor authentication, or app passwords for third-party mail apps. These requirements can change over time as providers improve security. If your login fails even with correct settings, check your provider’s current help documentation. Official support pages are the safest source for those details.
- Assuming custom domain settings are always the same. Custom email settings depend on where your email is hosted, not only where your domain is registered. Your domain might be registered with one company while email is hosted somewhere else. Always use the settings from the service that actually hosts your mailbox. If you are unsure, your provider’s support team can help you confirm the right source.
Why professional email matters
If you are still using a personal email address for business, this is a good moment to consider switching to professional email on your own domain. A branded address like hello@yourbusiness.ca or you@yourbusiness.com feels more polished and easier to trust. It also keeps your business communication separate from personal messages, newsletters, receipts, and that one loyalty program you joined for a 10% discount. Your inbox deserves boundaries too.
Professional email is especially useful when you are building credibility with customers. It reinforces your domain name every time you send a message. It also makes your business look more established, even if you are still working from a small desk, kitchen table, studio, truck, or spare room. Small signals can make a real difference when someone is deciding whether to reply, book, buy, or trust you with their information.
A custom email address also gives you more control as your business grows. You can create role-based addresses like support@, billing@, sales@, or hello@. You can add team members without relying on one shared personal inbox. You can keep communication organized in a way that feels calm instead of chaotic.
For Rebel users, this is where domain names, hosting, and email all connect. Your domain is not just your website address. It can also support your professional email, your brand identity, and your customer experience. When those pieces work together, your online presence feels much more complete.
Final thoughts
For most small business owners, the best email client setup is simple: use IMAP for incoming mail and properly configured SMTP for outgoing mail. IMAP keeps your inbox synced across your devices, which makes everyday email easier to manage. POP3 still has a few specific uses, but it is usually not the best default for modern business communication. When in doubt, choose the option that keeps your email accessible, consistent, and easier to support.
The right setup also saves you from the classic email gremlins: missing messages, folders that do not match, emails that only live on one device, and replies that refuse to send. Once your settings are correct, your email should fade into the background and let you get back to the actual work. That is the quiet magic of a good setup. No confetti required, although we would not object.
Ready to make your business email feel more professional? Start with a custom domain and a branded email address that customers can recognize and trust. Rebel can help you find the right domain, connect your email, and get your online presence working together with less guesswork.